
Palmers Green Bathroom
Bath and shower split into two, fully refitted
9 days
Premium
5⭐
A separate walk-in shower and bath in Palmers Green
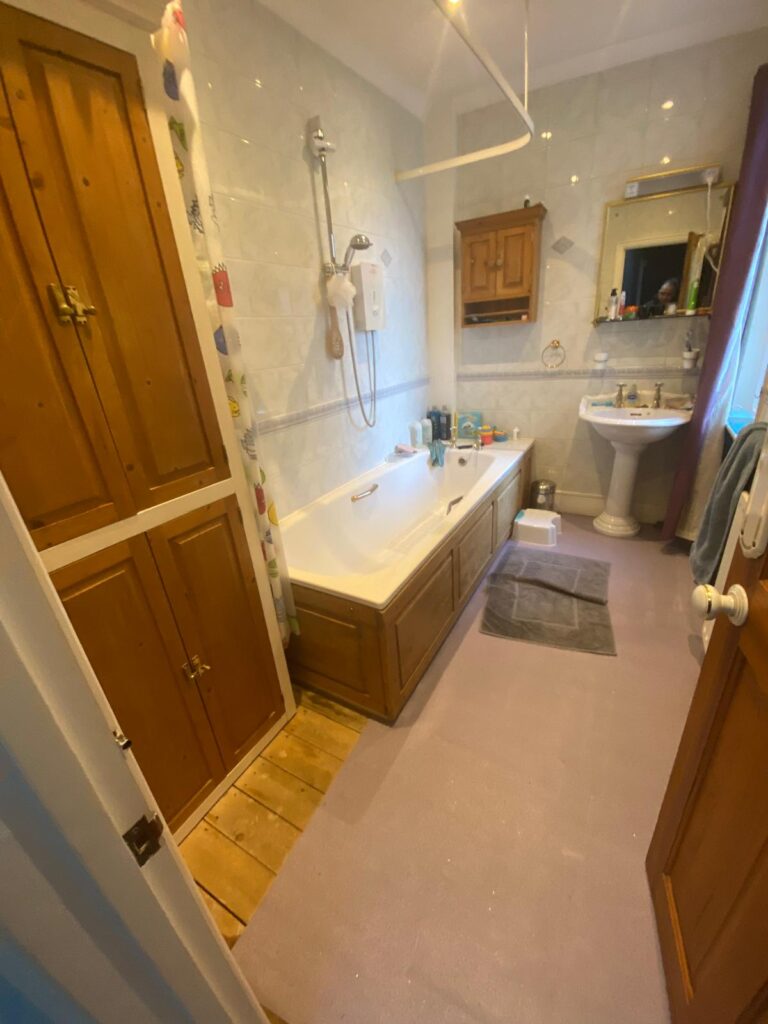
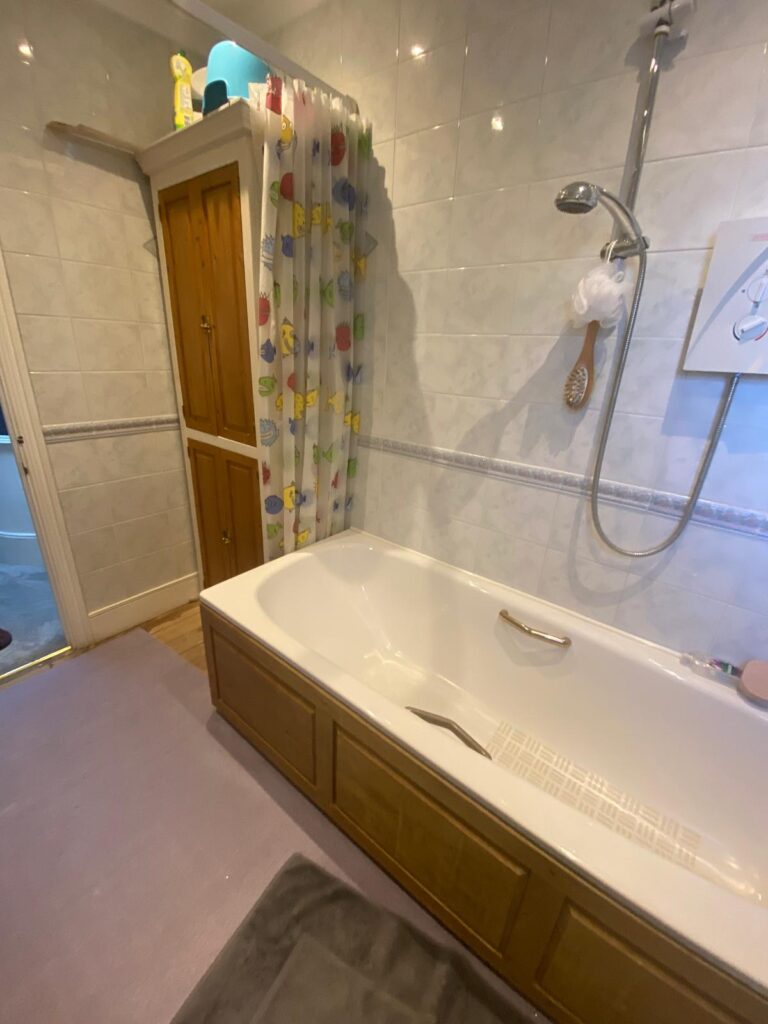
The customer had an electric shower over the bath, a pedestal basin and a tall built-in pine cupboard taking up one corner. They wanted a proper walk-in shower of its own, a separate bath, a vanity basin with storage and a heated towel rail, with everything moved round to suit the new layout.
The Challenge
This wasn’t a like-for-like swap. The shower, bath and basin all moved to new positions, so the water supplies and waste pipes had to be rerouted for each of them. The old electric shower supply had to come out completely. The wall where the new bath went wasn’t flat enough to tile, so we built a new stud wall in front of it to give a straight, true surface.
What we did
Strip-out
– Protected the floors on the way into the room.
– Removed the built-in pine cupboard, wall cabinet, mirror and accessories.
– Removed the old wall tiles, bath and panel, pedestal basin, electric shower and electric bar heater.
– Removed any plaster damaged by taking the tiles off, checked the existing pipework and inspected the subfloor.
– Took all waste away through a licensed waste carrier.
First fix: plumbing and electrics
– Disconnected the electric shower’s water and power supply and blanked off the old shower switch in the hallway.
– Ran a new supply and waste for the walk-in shower in its new spot next to the door, ready for an exposed shower valve.
– Moved the bath supply and waste to the far wall, and the basin pipework to the wall opposite the window.
– Altered the heating pipes for the new towel rail radiator.
– Moved the power supply to feed two wall lights by the basin and a wall-mounted toothbrush charger, repositioned the spotlight supply, and ran power for a new extractor fan with an isolation switch outside the room.
Walls, ceiling and floor prep
– Built a new stud wall behind the bath and lined it with moisture-resistant plasterboard.
– Dot and dabbed new plasterboard onto the external wall.
– Skimmed the walls that weren’t being tiled, and the ceiling, smooth ready for decorating.
– Laid a waterproof anti-crack mat on the floor ready for tiling.
Fitting
– Fitted the new shower tray on a plinth and the new bath.
– Tanked the walls and floor around the shower and bath.
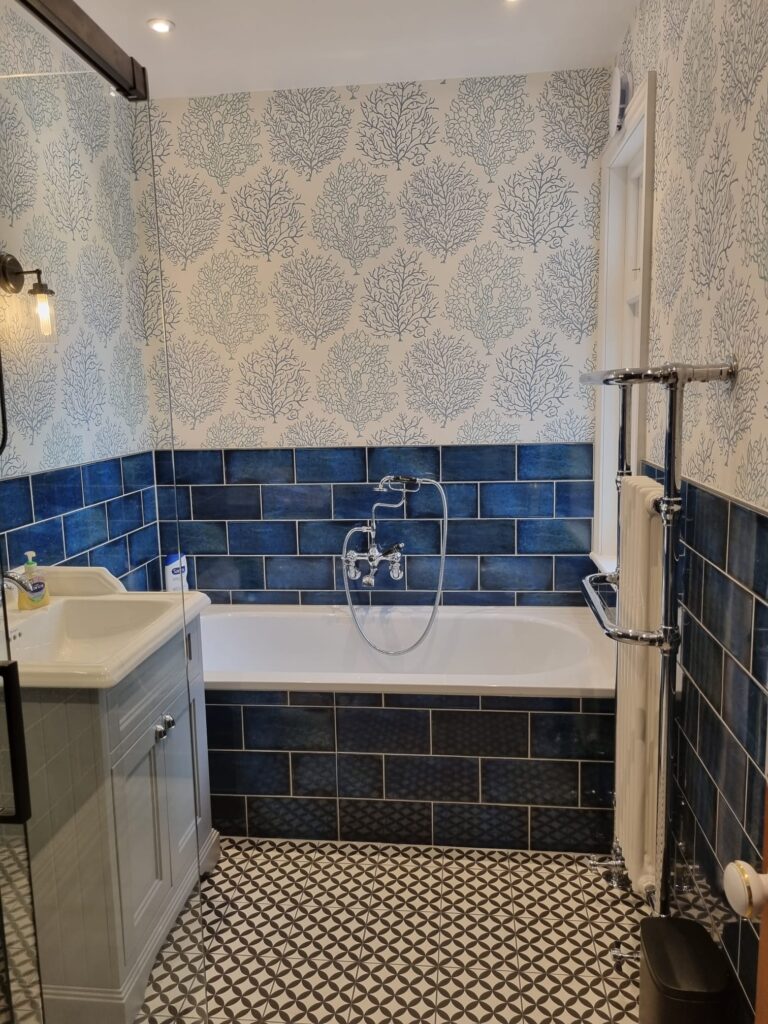
– Tiled the shower full height and the rest of the room to around 1.2m in blue brick-pattern tiles, including a tiled bath front.
– Tiled the floor in patterned square tiles.
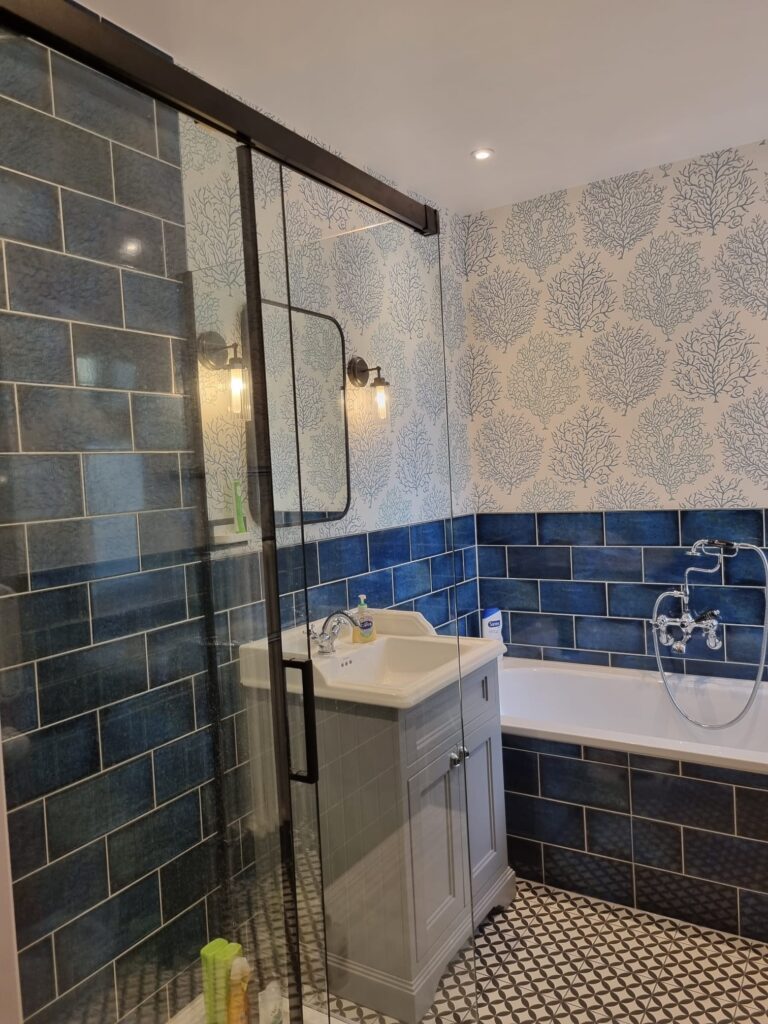
– Fitted the sliding shower enclosure, exposed shower valve with fixed head and handset, wall-mounted bath mixer with handset, floor-standing vanity unit and basin, towel rail radiator, wall lights, spotlights and extractor fan.
Finishing
– Hung wallpaper above the tiles on all walls.
– Fitted new coving and skirting on the new stud wall.
– Painted the ceiling and woodwork, then sealed everything with silicone.
– Tested every fitting and cleared the last of the waste.
The result:
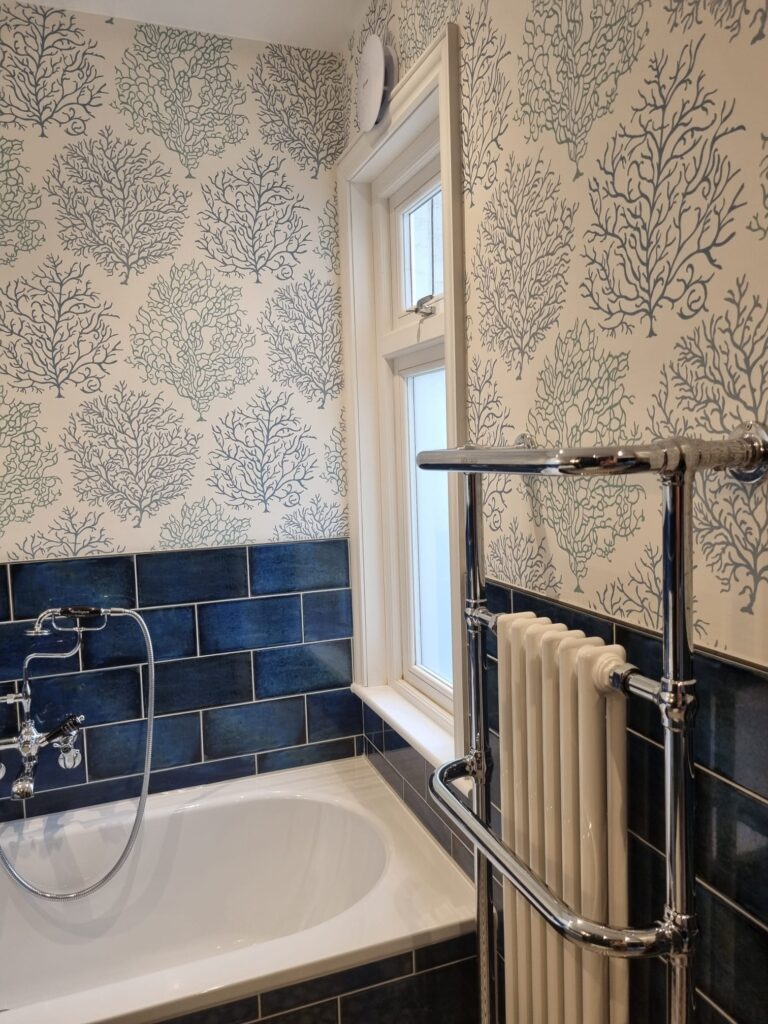
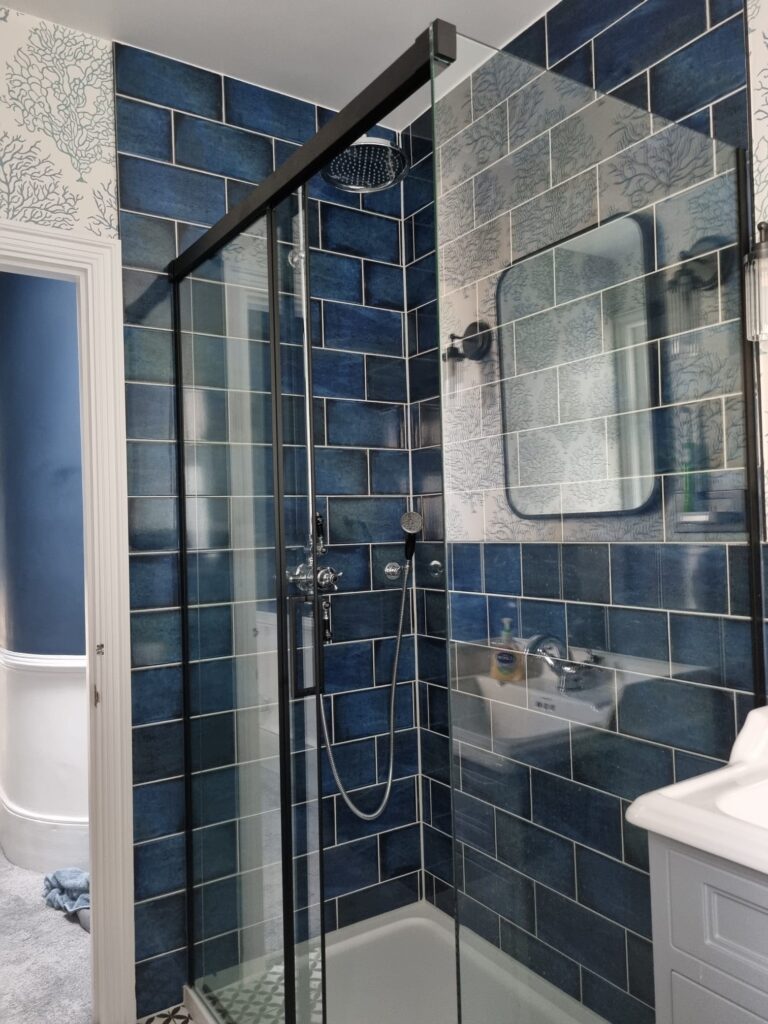
The electric shower over the bath is gone. The corner that used to hold a tall pine cupboard is now a full-height tiled walk-in shower behind glass. The bath sits on its own with a tiled front, and the pedestal basin has been swapped for a vanity unit with storage. There’s a heated towel rail, wall lights either side of the mirror and a proper extractor fan. Deep blue tiles, coral-pattern wallpaper and a black and white patterned floor replace the old marbled tiles and lilac floor covering.
Specification & Timeline
We delivered precision across all trades
Project Timeline
Duration:
9 working days
Scope:
Full bathroom refit, labour and waste disposal
Layout:
Shower, bath and basin all moved to new positions
Shower:
Walk-in tray on a plinth, sliding glass enclosure with black frame, exposed valve with fixed head and handset
Bath:
New bath with wall-mounted mixer and handset, tiled front
Basin:
Floor-standing vanity unit
Heating:
Towel rail radiator in chrome and white
Walls:
Blue brick-pattern tiles, full height in the shower, around 1.2m elsewhere; coral-pattern wallpaper above
Floor:
Black and white patterned square tiles on anti-crack matting
Lighting and air:
Two wall lights, spotlights, extractor fan
Materials:
The customer bought the materials; we passed on our trade discounts and advised on what to buy.
Before & After Result
Magazine-worthy transformation
Before 1
Before 2
After 1
After 2
After 3
After 4
Want a Luxury Bathroom Like This?
From structural disasters to luxury transformations, Paul's expertise delivers results that exceed expectations. Whether you need complete rebuilding or premium finishing, we have the capability and craftspeople to deliver perfection.
SDL PKB Luxury Bathroom Promise
Structural Capability • Premium Finishes • Master Craftspeople • Rob’s Personal Management • Years Guarantee